Friday, April 2, 2010

Honey Lime Chicken.

A new recipe, that is actually healthy for you, and tastes amazing. Yup. I've got it right here. If you like lemon and orange chicken from Chinese restaurants you will love this, I promise. It is so easy I think it actually takes less time than ordering in, or buying those pre-made packages in the grocery store.
For some reason I thought that Honey Lime Chicken would be a Mexican tasting dish, I don't know why, especially with Soy Sauce right there in the ingredients, but I did. So I made a modified Mexican rice to go with it. That was not so tasty, Mexican rice and a sweet tart oriental chicken... never a good thing. Oh well.

Honey Lime Chicken
from Blood Types, Body Types and You
1/2 tsp. garlic powder
4 boneless skinless chicken breast halves
1/3 c pineapple juice.
1/4 c honey
1 tsp lime zest
3 Tbsp fresh lime juice
2 Tbsp Soy Sauce
2 tsp corn starch

1 ~ Sprinkle garlic powder over chicken, let sit while you prepare sauce. In a small bowl whisk together pineapple juice, honey, lime zest, lime juice, and soy sauce until well mixed.


2 ~ Brush Chicken with sauce. Heat large nonstick skillet ti medium heat. Cook each piece of chicken 5 min on each side or until done.
3~ Bring leftover marinade/sauce to a boil. Lower to simmer for 2 min. Add cornstarch and whisk in to thicken. Pour over chicken.

DD's notes ~ If I were to make this again I would either serve it with plain rice or over rice noodles. I would serve a green veggies stir fry with it, snow peas, broccoli, bell pepper, and green onions.

Friday, March 19, 2010

New recipes.

Well as some of you know my husband is currently deployed. So in order to keep things going and give myself something fun to look forward to I have decided to get a little Julie and Julia on you. I have gone through quite a few cookbooks and I will be making all of the recipes in them that I cannot make while my wonderful husband is home. He and I most definitely do not see eye to eye on what tastes good all of the time. He is a meat and potatoes kind of a guy, and I am more of a chicken and veggies girl. Since I generally cook in a way that makes him and my children, who eat like him, happy; I am really excited to try some new things.

I will not be pulling from any one cookbook, and as some of you already know, I will not be following the recipes exactly. I will however post the original recipe, as well as the changes that I made. I will tell you when it was good and when it was really bad. If you have any recipes that you LOVE that you would like me to try please share them, also if you have any recipes that you have been wanting to try but are afraid to share them with me and I will see if they would work for us. Some of the parameters that I am trying to follow are... no diary, no red meat, and little to no wheat. This is because I am trying to eat for my blood type.

Today will not be the start of this, but I will share a recipe that I made last week when I was home with my family. It turned out really well, with the picky children asking for 3rds. So sorry no pictures.

Chicken and Artichokes in Wine Sauce
from Blood Types Body Types and You by Joseph Christiano

4 boneless skinless chicken breasts cut in half
1/4 c spelt flour
4 tbsp olive oil
1 tsp dried thyme
1 1/2 tsp dried rosemary
Pinch oregano
2-3 cloves garlic
1/2 c white wine
1/2 c chicken broth
3-4 sliced artichoke hearts packed in water
1/4 c fresh chopped parsley

Rinse chicken and pat dry. Dredge chicken in flour. Heat 2 tablespoons of olive oil in large nonstick skillet over medium-high heat. Cook chicken 3 minutes on each side.

Reduce heat. Add dried herbs to skillet with remainder of the olive oil. Distribute herbs evenly. Add wine, chicken broth and artichoke hearts to pan. Cover and let simmer for 10 min. Stir in parsley.

DD's notes.
1- I used 8 boneless skinless tenderloins instead of breasts cut in half.
2 - I put the flour in a Ziploc baggy with the dried chicken and just shook it all around.
3- I used 1T olive oil and 1T butter when browning the chicken.
4- I bought whole artichoke hearts and used the whole can so there were actually 5 in the recipe.
5- I used white cooking wine instead of drinking wine, the salt helped in my opinion.
6- This was served over angel hair pasta, made of spelt. It turned out wonderfully, tastes just the same as regular pasta.

Thursday, March 18, 2010

Homemade Hummus.


Yes I know that there are a million recipes for Hummus out there floating around, but since it is a favorite around our house and I make it differently than most people I figured I would share mine.
Please ignore the dent in the right side, the girls couldn't wait and started eating before I got the camera out, as you can see this is a winner at our house even with my ultra picky kids.


Hummus


1 can organic garbanzo beans.
1/2 lemon for juicing
Olive Oil (I like to use the light)
Garlic salt
Southwestern seasoning.


1) Drain and Rinse Garbanzo beans. Place in food processor or blender. Add fresh lemon juice (I like to first juice the lemon into another container and remove the seeds) you should get approx 2T. Add 1/4 c Olive oil.


2) Pulse in blender/processor until the mixture is thick and not moving much (don't burn out your motor). Add 1 t garlic salt and 1t southwest seasoning (without salt, I use Pampered Chef). Also add another 1/4 c olive oil. Pulse or blend until mostly smooth.


3) Scrape down the sides add a second teaspoon of southwestern seasoning to taste. Also add olive oil if need be. Blend again until the mixture is smooth, about the texture of re-fried beans.


DD's notes: These measurements are not exact, watch your mixture and your machine, taste frequently, be involved in what you cook.


You can use any seasoning mix that you enjoy, I have used Italian, Asian, and Curry all with good results.
The flavors will intensify with storage, so if you are making this ahead of time under season and it should be good, you can always mix more spice in last minute, you can never take it out.
~DD

Thursday, October 22, 2009

Everlasting Pumpkins

Well, not totally everlasting, but they will definitely make it longer than the real ones. I made them for Thanksgiving decorations, but you could easily add Jack o' Lantern faces and use them for Halloween.

I got the idea from a Martha Stewart Magazine, hers were made of a beautiful silk that had the sheen of a real pumpkin, I was too frugal to buy the silk.

So here are step by step directions with pictures, because I'm helpful like that.

First cut the fabric into rectangles that are twice as wide as they are tall. I cut mine at 6 x 12, 8 x 16 and 12 x 24.

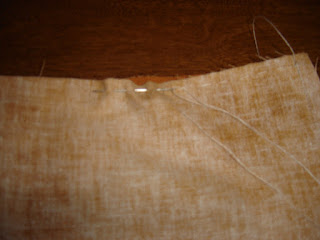
Then fold the fabric right sides together to form a square. Sew a 1/4 inch seam along the side (that's to the edge of the machine foot)


While the fabric is wrong side out sew a running/gathering stitch around one edge, 1/4 inch in. Pull tight to form a circular closing on the bottom. Then sew through the gathered portion multiple times to ensure that it remains closed.


Turn right side out and stuff.


Do a running stitch 1/4 inch down on the top and pull tight to close. Sew through the gathered portion again.

Run 3 strands of embroidery floss through the center and around the sides to make the indentations. I sewed down through the first gathered side and out through the second one. Make as many as you want, I used between 5 and 7 depending on the size.


Cut a square of brown fabric and fold the edges into a circle and place on the bottom of the pumpkin (second side gathered. ) use a whip stitch to secure to the pumpkin.


In the same brown fabric cut out a stem shape. Sew the side when wrong side out and then flip to right side out. If it is large you might need to stuff it to keep its shape. You can either sew it to the top of the pumpkin or hot glue it. I like the look of the glue better.


Ta-da! A fabric pumpkin.


You can get 1 large, 2 medium, and 2 small pumpkins out of 1/2 yard of fabric. I stuffed 20 pumpkins with 2 bags of poly fill. All in all for 20 pumpkins I spent $10.

Saturday, August 22, 2009

Bulgogi - Korean Beef


This is a favorite at our house, even with my veggie hating husband. It is also easy which makes it that much more appealing. Keep in mind that this recipe is one that deals with approximate measurements, feel free to adjust it to your personal taste.


1 roast VERY thinly sliced. (ask the butcher to do this for you) ( I use bottom roast)

1/2 Onion

5 large carrots (or 12 baby carrots)

5-7 Green Onions

3 T. Minced Garlic

1 bottle Soy sauce (1.5 to 2 c) ( get the good stuff, it is worth it)

Start the meat marinading at least 24 hours before you want to serve it, 48 hours is better. Thinly slice all the veggies, the thinner the better. Mix all of the ingredients in a large bowl. When they are mixed the soy sauce should just barely cover all of the other ingredients. Cover and place in the fridge, stir occasionally (once every 8 hours or so)

The night you want to eat, take the meat out of the fridge. Use a large skillet. Pre-heat the skillet to very hot then put the meat in (if your skillet isn't big enough for all the meat you can do this part in batches) Saute the meat until it is cooked through, serve on rice.

Tuesday, August 18, 2009

Autumn Harvest Pork Chops


Yum! These were a big hit at our house last night. I have been getting bored with our meals at the house recently. I seem to do the same old over and over again. So I broke out the cookbooks and started searching for ideas.

I came across the recipe for Autumn Pork Chops in one of my small Campbell soup Cookbooks. I did substitute home made cream soup for the Campbell's that the recipe called for. It turned out REALLY well. Every one in the house loved it which is a huge thing for this house. I served them with brown rice and sauteed zucchini. It was just the right combination of flavors and types of food.

Autumn Harvest Pork Chops

1 T. Oil (vegetable or olive)
4 pork chops (3/4 in thick)
2 T & 1 T butter
2 T flour
1/2 c. finely diced celery
1/2 t. salt
1 c milk
1/2 c. apple juice or water
2 T Spicy Brown mustard
1 T Honey
Ground Black Pepper (to taste)

Put oil into a large skillet and turn heat to med-high. Once the oil is hot put Chops in to brown, about 5 min on each side. While they are browning.
In a small saucepan put 1 T butter and all of the diced celery, saute the celery until it is starting to get clear. Put 2 T butter in saucepan and wait for it to melt, add the 2 T flour and stir to form a rue. Cook the rue over med-high heat for 1-2 min (this will help remove the taste of flour) Then add the milk slowly stirring all the time to form a creamy soup. Add salt to taste, I used celery salt to give my "cream of celery soup" more flavor. Once the soup comes to a boil it should be smooth and thick. Take off the heat.
When the Pork is browned, remove it from the pan and drain all of the grease. Then put the soup, apple juice, mustard, honey, and pepper in the skillet. Mix and cook until well combined and heated through, about 3-5 min. Re-add the Chops to the pan, cover and turn the heat to low. Cook for an additional 10 min until pork is done. (Don't overcook, I use a meat thermometer to check for doneness.)

Tuesday, June 2, 2009

Bloggity, blog, blog, blog

I am not sure why I am writing this now, I should be waiting until I hear from the hubby. I am a little stressed out today. He is going before the Med board right now to see if they will clear him to go back to full regular active duty after his ankle surgery or if they are going to start the proceedings to kick him out. I know that he is capable of going back to work, and I know that he wants to. It just worries me that he is even having to go through this. Hopefully this is nothing more than a routine walk in and walk out with a full medical clearance to work.

Other than that we are not doing much right now which is amazing. We have had family visiting us for what seems like forever in reality it was only a few weeks, but it is amazing how much that will throw you off. The little dog is gone. My brother took him back. And even though I miss him I am also really glad to have him gone, he was turning into a terror with his chewing every toy that the girls put on the floor for more than 2 seconds. I am getting things cleaned up and put away the way that I want them to be and just enjoying getting back into the routine that works best for me and the girls, not me, the girls, and whoever is staying here.