I got the idea from a Martha Stewart Magazine, hers were made of a beautiful silk that had the sheen of a real pumpkin, I was too frugal to buy the silk.
So here are step by step directions with pictures, because I'm helpful like that.
First cut the fabric into rectangles that are twice as wide as they are tall. I cut mine at 6 x 12, 8 x 16 and 12 x 24.

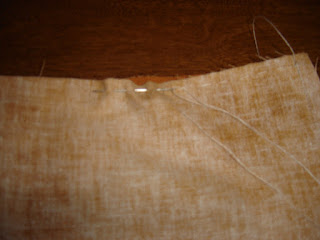
Then fold the fabric right sides together to form a square. Sew a 1/4 inch seam along the side (that's to the edge of the machine foot)


While the fabric is wrong side out sew a running/gathering stitch around one edge, 1/4 inch in. Pull tight to form a circular closing on the bottom. Then sew through the gathered portion multiple times to ensure that it remains closed.


Turn right side out and stuff.


Do a running stitch 1/4 inch down on the top and pull tight to close. Sew through the gathered portion again.

Run 3 strands of embroidery floss through the center and around the sides to make the indentations. I sewed down through the first gathered side and out through the second one. Make as many as you want, I used between 5 and 7 depending on the size.


Cut a square of brown fabric and fold the edges into a circle and place on the bottom of the pumpkin (second side gathered. ) use a whip stitch to secure to the pumpkin.


In the same brown fabric cut out a stem shape. Sew the side when wrong side out and then flip to right side out. If it is large you might need to stuff it to keep its shape. You can either sew it to the top of the pumpkin or hot glue it. I like the look of the glue better.


Ta-da! A fabric pumpkin.

You can get 1 large, 2 medium, and 2 small pumpkins out of 1/2 yard of fabric. I stuffed 20 pumpkins with 2 bags of poly fill. All in all for 20 pumpkins I spent $10.