| Day | Breakfast | Lunch | Snack | Dinner |
| Wednesday, February 1 | Oatmeal | Peanut Butter and Honey | Granola Bars | Sloppy Joe's , Corn on the Cob |
| Thursday, February 2 | Biscuits | Peanut Butter and Honey | Hummus, Veggie Sticks | Rolled Hot Dogs |
| Friday, February 3 | Cinnamon Toast | Peanut Butter and Honey | Gold Fish, Fruit, String Cheese | Chicken'n Rice Green Beans |
| Saturday, February 4 | Cereal | Quesadillas | Gold Fish, Fruit, String Cheese | Pancakes Bacon Fruit Salad |
| Sunday, February 5 | Oatmeal | Mac and Cheese | Trail Mix | Meat Loaf Broccoli Sweet Potato |
| Monday, February 6 | Muffins | Peanut Butter and Honey | Trail Mix | Chicken Tenders Green Peas Rolls |
| Tuesday, February 7 | Cereal | Peanut Butter and Honey | Granola Bars | Princess O's |
| Wednesday, February 8 | Cinnamon Toast | Peanut Butter and Honey | Trail Mix | French Dip, Green Beans |
| Thursday, February 9 | Oatmeal | Peanut Butter and Honey | Gold Fish, Fruit, String Cheese | Pizza |
| Friday, February 10 | Cereal | Peanut Butter and Honey | Granola Bars | Hamburgers, Tater Tots, Crudites |
| Saturday, February 11 | Biscuits | Grilled Cheese | Trail Mix | Orange Chicken, Rice Stir Fried Veggies |
| Sunday, February 12 | Pancakes | Hot Dogs | Jello | Chicken Helper Peas Crescent Rolls |
| Monday, February 13 | Muffins | Peanut Butter and Honey | Jello | Pork Loin, Roasted Veg |
| Tuesday, February 14 | Oatmeal | Peanut Butter and Honey | Trail Mix | David's Choice |
| Wednesday, February 15 | Cereal | Peanut Butter and Honey | Gold Fish, Fruit, String Cheese | Leftovers |
Showing posts with label Recipes. Show all posts
Showing posts with label Recipes. Show all posts
Sunday, January 29, 2012
February Meal Plans.
I figured since I went to the trouble of creating these full meal plans each month, I might as well start sharing them. Now I realize that the meals are all extrememly healthy, or exactly what I want to encourage families to eat. However they are a mixture of healthy and family favorites. So that's what you get. Now I've got to figure out how to insert the correct kind of document into the blog to share it with you. This should be fun. I hope that this all worked out. As the week goes on I will link some of the meals to the recipes that I use for them so that you have access to that. Enjoy!


Thursday, October 6, 2011
Gingered Pork Tenderloin
My Mom made this pork tenderloin one year for Easter and I fell in love with it. It is an easy and very impressive recipe to prepare. My favorite way to serve it is with mixed roasted veggies on the side. I will usually put one 9x13 pan with the pork next to another 9x13 pan with the veggies. Tonights vegetable combo was cauliflower, broccoli, and sweet potato.
GINGERED PORK TENDERLOIN
2 1/2 lb. pork tenderloin
1/8 tsp. dry mustard
1/8 tsp. thyme
1/2 cup dry sherry
1/2 cup soy sauce
3 gloves garlic, minced
2 T. fresh ginger, minced
SAUCE
3/4 cup ginger preserves (I couldn't find these. used apricot instead)
2 T. dry sherry
1 T. soy sauce
Rub meat with mustard powder and thyme. Place in a non-reactive dish and add 1/2 c. sherry, 1/2 c. soy sauce, garlic and ginger. Coat the loin well. Cover; refrigerate overnight.
NEXT DAY: Preheat oven to 325 degrees. Place loin with liquid in oven uncovered. Bake at 325 for 30 minutes per pound, or until internal temperature reaches 160 degrees. Baste occasionally while cooking.
SAUCE: Meanwhile, heat preserves with sherry and soy sauce over medium heat until melted. Reduce heat to low and simmer. Pour over loin when it's done.
NOTES: I usually don't measure the mustard and thyme I just sprinkle it lightly over the outside.
Sometimes I don't remember to make the sauce. It's still amazing without it.
~DD
Thursday, May 26, 2011
Pot Stickers, a healthy version.
 This is another recipe from my new cookbook. I am loving all of the things that I have tried so far and I have a list of over 100 recipes from the book that I am wanting to try. So that should keep this section of the blog going for at least the rest of the year. Although I will keep throwing out some of my families favorite foods and some things that I find from other locations.
Today's recipe is for Chicken Pot Stickers. It is a really easy basic recipe that I can already see a million variations for. So here it goes. I realize that this isn't the healthiest that these can get, but I know that they are much better than the pork stuffed with a zillion extra calories and preservatives type that you buy in the freezer section.
Chicken Pot Stickers.
2 T chili sauce (I left this part out of the girls sauce)
1 T finely chopped fresh cilantro
1 T Teriyaki Sauce
1 t rice wine vinegar
1 t peeled fresh diced ginger
pinch cayenne (again I left this out of the girls)
1/2 lb ground skinless chicken breast (I used turkey because that was what I had)
1/2 c finely shredded napa cabbage (sometimes labeled chinese cabbage)
1 scallion minced
2 t soy sauce (I used Bragg's Liquid Amino's)
1 t cornstarch dissolved in 2 t water
1/4 t mustard powder
1/8 t ground black pepper
20 (3 in square) wonton skins
4 t peanut oil
1 c chicken stock
1 t all-purpose flour
1 T toasted sesame seeds
1) To prepare sauce, in a small bowel, combine the chili sauce, cilantro, teriyaki sauce, vinegar, ginger and cayenne.
2) To prepare the filling, in a medium bowel combine the chicken, cabbage, scallion, soy sauce, dissolved cornstarch, mustard and pepper.
3) Cover the wontons with plastic wrap; have a small bowel of water near your work area. Working with 1 wonton wrapper at a time, spoon 2 teaspoons of the filling into the center of each wonton skin. Moisten the edges with water; fold diagonally to form a triangle. Seal the edges, pressing out all the air. Repeat with the remaining wonton's and filling.
4) In a large non-stick skillet, heat the oil until it is almost smoking. Place the dumplings in a circle in the skillet; reduce the heat slightly and cook until the bottoms are golden brown 5-7 minutes.
5) Meanwhile, in a small saucepan, bring the stock to a boil. Remove from the heat; sprinkle in the flour ans stir until dissolved. Pour the broth over the dumplings; cook, partially covered, until all of the liquid evaporates. Uncover and cook until the bottoms are crisp. Carefully loosen the dumplings with a spatula. Serve with sesame seeds sprinkled on top and sauce on the side.
DD's notes.
1) These are a pretty plain recipe, the flavor is in the sauce. The next time that I make them I think I will be mixing the ginger and cilantro into the meat mixture instead of just putting it in the sauce. I might also add some finely grated carrots.
2) This recipe is so easy to double it almost asks for it. Wonton wrappers are sold by the group of 50 in my grocery store, not 20, so I had plenty. I doubled this recipe and had enough filling to fill all 50 wrappers. I froze the second batch on a cookie sheet with parchment paper on top and then packaged into groups of 5-6. They cook from frozen exactly the same as fresh.
3) I made a lot more dipping sauce than it called for so that each person had their own mixture based on their individual taste.
4) While this is an easy recipe the wrapping of the dumplings takes a while. I spent roughly 30 minutes just on that part of the recipe. So make sure that you have the time to do that. I also folded the corners in so that the dumplings looked like an open envelope instead of leaving them in a triangle, I thought that they looked better that way, and that they took up less room in the pan.
5) The first time I made this I tried to use a pan that was too small and crowded them in. That was a BAD plan. They ended up all cooked into one huge mass. So when you cook them make sure that they aren't touching in the pan, it makes it a million times easier to get out at the end.
Thursday, April 28, 2011
Tasty Thursday ~ Honey Wheat Crescents
I just bought this cookbook after looking through it at my MIL's over Spring Break. It has a ton of amazing recipes that I would like to try. Actually 109 so fat, although I am sure I will find more. So I decided to start with something that I already had all the ingredients for. So Bread it was. I actually haven't made bread in a while so I was surprised that I had everything on hand.

Honey Wheat Crescent Rolls
1 c. warm (105-155 F ) water
2 tablespoons honey
1 package active dry yeast
1 1/2 cups all purpose flour
1 cup whole wheat flour
1 1/2 teaspoons salt
1. In a 2-cup measuring cup, combine the water and honey; sprinkle in the yeast and let stand until foamy, about 5 minutes.

2. In a food processor, combine the all purpose flour, whole wheat flour, and salt. With the machine running, pour the yeast mixture through the feed tube; pulse until the dough forms a ball, about 1 minute. Turn dough out onto a lightly floured surface and knead a few times until smooth.
OR
2. To mix by hand: In a large bowel combine water honey and yeast until foamy. Stir in the all-purpose flour, whole wheat flour and salt. Stir until the dough starts to form around the spoon. Turn out onto a lightly floured surface; knead until the dough is smooth and elastic, about 10 min.
OR
2. In a large mixing bowl with a dough hook attachment, put both flours and salt into the bowl.

Add yeast mixture from step one and run on med-low speed until combined.

Turn out onto a floured surface and knead until smooth and elastic (2-5 min)
3. Spray a large bowel with nonstick spray; put the dough in the bowel. Cover lightly with plastic wrap.

Let the dough rise in a warm draft free place until doubled in volume, about 35 minutes.

4. Spray a baking sheet with non-stick spray. Punch down the dough.

Sprinkle the work surface lightly with flour. Turn the dough onto the work surface; cut in half. Roll each half into a 10 inch circle.

Cut each circle into 6 wedges.

Roll each wedge, from the wide side, and form into a crescent. Place pointed end down, on the sprayed baking sheet. Repeat with remaining dough, arranging the rolls 1 inch apart/ cover lightly with plastic wrap and let rise in a warm, draft free place until they double in size, about 35 min.

5. Preheat oven to 375 F.

Bake the rolls until they are golden brown and sound hollow when tapped, about 15 minutes. Remove from the tray and cool on a cooling rack. Serve warm or at room temp. These can be frozen and re-heated.

Nutrition information - 1 roll - 103 cal, 0 g fat, 0 g sat fat, 0 g trans fat, 0 mg chol, 292 mg sodium, 22 g carb, 2 g fiber, 3 g prot, 7 mg calc. Weight Watchers Points 2.
I pretty much made the recipe according to the directions, well, mostly. I didn't measure the honey, so I am pretty sure I got too much in. I also don't have a food processor so I used my Kitchen Aid with the Bread hook and good old fashioned kneading.
These are not buttery crescent rolls, but they are really yummy. The girls loved them and they made the house smell amazing. Enjoy!
~DD

1 c. warm (105-155 F ) water
2 tablespoons honey
1 package active dry yeast
1 1/2 cups all purpose flour
1 cup whole wheat flour
1 1/2 teaspoons salt
1. In a 2-cup measuring cup, combine the water and honey; sprinkle in the yeast and let stand until foamy, about 5 minutes.

OR
2. To mix by hand: In a large bowel combine water honey and yeast until foamy. Stir in the all-purpose flour, whole wheat flour and salt. Stir until the dough starts to form around the spoon. Turn out onto a lightly floured surface; knead until the dough is smooth and elastic, about 10 min.
OR
2. In a large mixing bowl with a dough hook attachment, put both flours and salt into the bowl.


3. Spray a large bowel with nonstick spray; put the dough in the bowel. Cover lightly with plastic wrap.
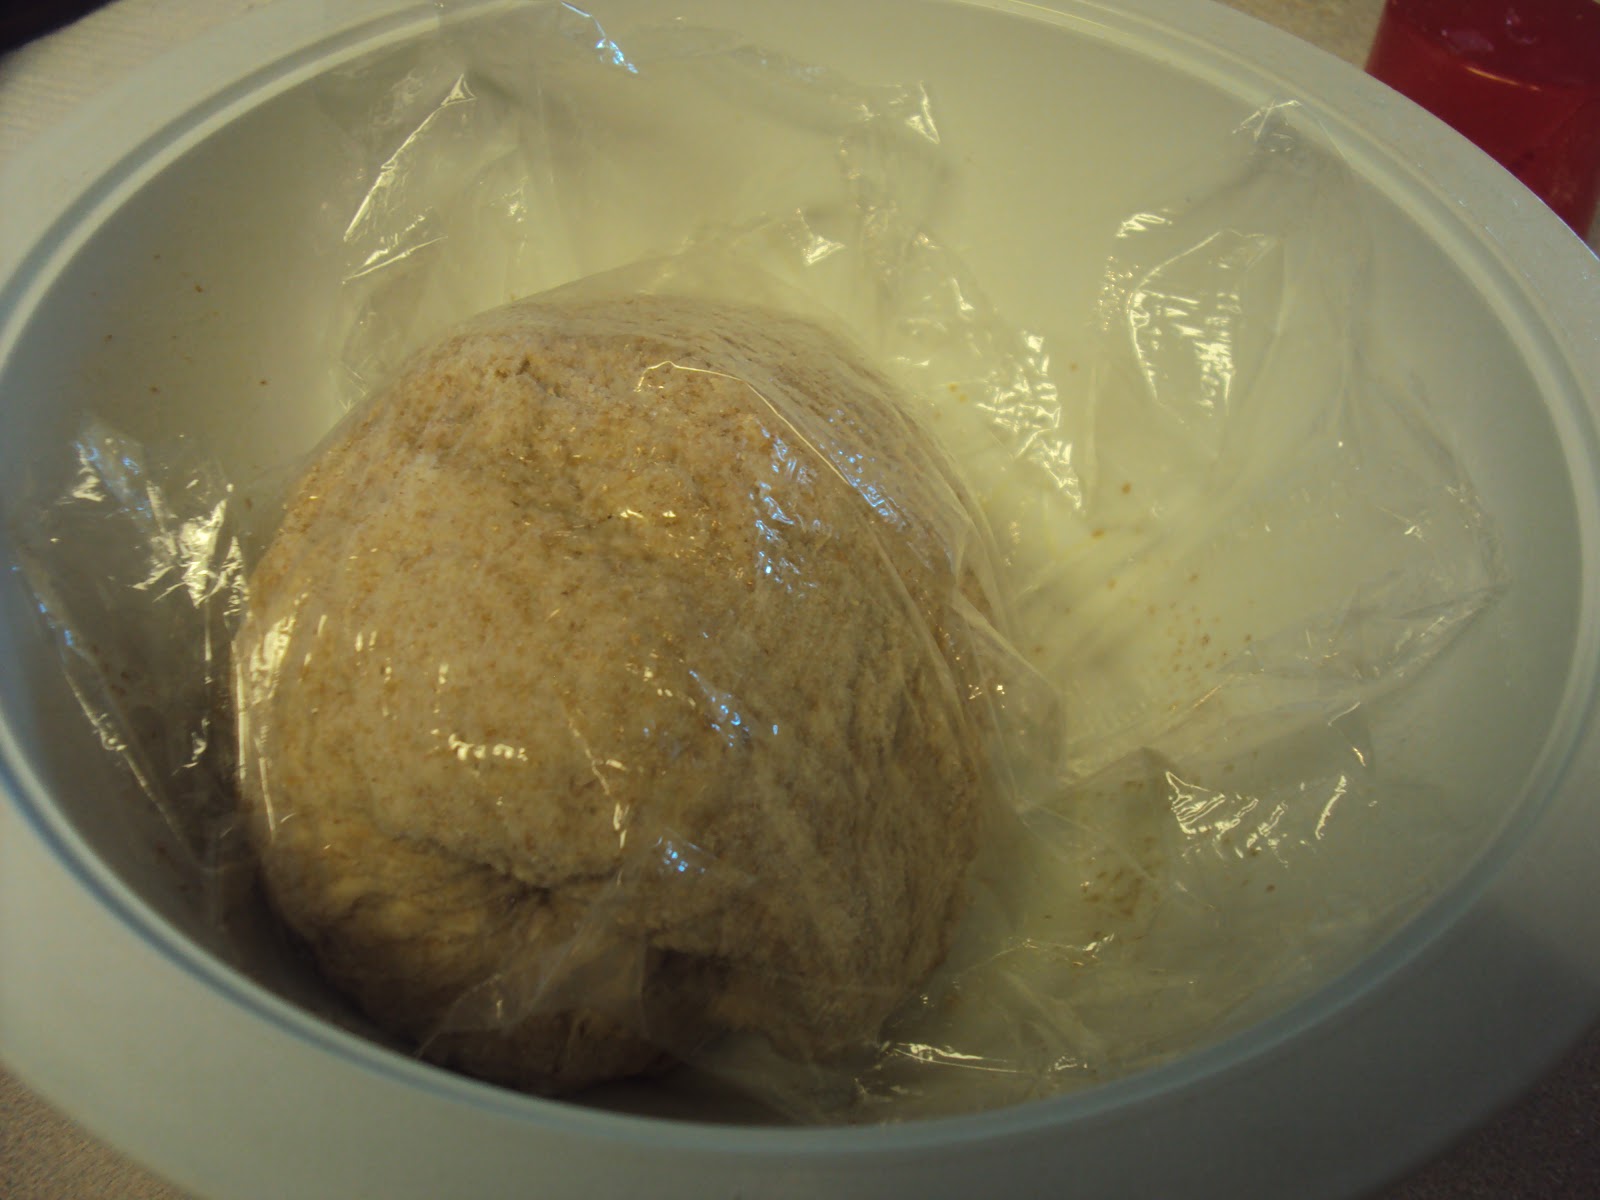

4. Spray a baking sheet with non-stick spray. Punch down the dough.

Sprinkle the work surface lightly with flour. Turn the dough onto the work surface; cut in half. Roll each half into a 10 inch circle.

Cut each circle into 6 wedges.

Roll each wedge, from the wide side, and form into a crescent. Place pointed end down, on the sprayed baking sheet. Repeat with remaining dough, arranging the rolls 1 inch apart/ cover lightly with plastic wrap and let rise in a warm, draft free place until they double in size, about 35 min.

5. Preheat oven to 375 F.

Bake the rolls until they are golden brown and sound hollow when tapped, about 15 minutes. Remove from the tray and cool on a cooling rack. Serve warm or at room temp. These can be frozen and re-heated.

Nutrition information - 1 roll - 103 cal, 0 g fat, 0 g sat fat, 0 g trans fat, 0 mg chol, 292 mg sodium, 22 g carb, 2 g fiber, 3 g prot, 7 mg calc. Weight Watchers Points 2.
These are not buttery crescent rolls, but they are really yummy. The girls loved them and they made the house smell amazing. Enjoy!
~DD
Tuesday, March 22, 2011
Quinoa Stuffed Bell Peppers
 This is another of my go-to meals that I usually have all the ingredients for on hand. Something I love for a substantial lunch or for a light dinner. Now DH and the girlies are not huge fans of this as a meal, mostly because it very obviously contains vegetables, which they all try to avoid as much as possible.
If you haven't tried Quinoa yet you really need to. It is an amazing little grain that tastes and feels somewhat like a nutty whole grain cous cous. It is a wonder grain that contains high amounts of protein and is gluten free, this makes it an excellent addition to both vegetarian and low-carb style diets.
Ingredients:
4 Bell Peppers, I prefer green, mostly because they are the cheapest, use whatever you like.
1 small onion
2 cloves garlic
1/2 c chopped tomatoes. I use grape tomatoes, I think that they have the best flavor.
1 T Olive Oil
1 c. Quinoa (dry)
2 c vegetable stock (or any other stock or broth, just don't use plain water)
1 t oregano
1 t cumin
1-2 T tomato paste
Optional:
1/2 t chili flakes
Fresh lime wedges
Fresh Cilantro
Cheese
Meat
 Ok, Start by cutting off the top 1/3 of the bell peppers. Clean out the insides from both the top and the bottom. Place all of the larger bottoms in a microwave safe dish. Then chop the top part of the peppers (leaving the stems out) the onion and the tomatoes.
 Place the bottoms of the Peppers into the microwave for 5-7 min until just soft and starting to cook.

Put the olive oil, garlic, peppers, and onions into a sauce pan and saute until the onions start to turn clear. Add the tomatoes. Saute for another 2-3 min.
 Add the dry quinoa, stock, spices, and tomato paste to the pan and stir well. Let boil for 15 minutes. If there isn't enough liquid to fully cook the quinoa you can add more stock or some water as you go. You can tell when the quinoa is done by looking at it. It should turn mostly clear looking with a little white germ visible around the side. There shouldn't be any white polka dots of opaqueness in the middle.
 When it is done you can stuff the peppers and serve immediately. As you can see I only has 2 peppers so I had some leftover stuffing. Adding cheese or meat on top makes it a more filling meal, adding the lime and cilantro really brightens up the heaviness of the tomato. These freeze well, I usually eat 1 and then have the others for lunch later.
Enjoy!
~DD

Sunday, March 20, 2011
Spinach Mushroom Pasta
Aaaahhhhh. I feel like this lunch needs a cue of angelic music playing in the background when you look at it. This is my go-to lunch, something that I can eat every single day and not get tired of it. There are a million different variations to this meal, I'll show you the basic recipe and mention a few of the variations but let your imagination run wild.

Ingredients:
1/2 - 1 c Dry Pasta, whatever you have, I prefer short shaped pasta, elbows, farfalle, shells and the like. I often use a mixed colored pasta.
2 T Butter or Olive Oil.
1-2 Cloves Garlic Minced (I use the jarred stuff about 1.5 t)
1 c chopped crimini mushrooms (large chop about 1/2 in square)
2 c spinach in a large chiffonade (strips about 1/4 in)
Sea Salt and Black Pepper to taste
Optional:
1/2 c White Wine
Parmesan Cheese
Cook the pasta, make sure that there is plenty of salt in the water to give the pasta flavor.

Melt the butter over med heat (or start the olive oil warming). While it is melting chop the mushrooms.

Add the garlic to the hot oil, make sure it isn't too hot so that it doesn't burn the garlic. Let cook for about 1 min to make sure that all the butter tastes like garlic.

Add the mushrooms and start to saute them. While they are cooking chop the spinach. If you are adding wine add it during this step.

Add the spinach when the mushrooms look almost all the way sauteed. They should have shrunk and look wet and succulent. Cook just until the spinach looks wilted. Add salt and pepper to taste. Turn off the heat. By now the pasta should be done, drain it and put it into a bowl, top with the mushroom mixture.
 If you are using the Parmesan top your pasta now and enjoy!

Saturday, January 22, 2011
Mini Quiche Now with Pictures!
So I have thought about all sorts of things to call these little bites of yummy, but nothing too creative, in my head I call them random leftover quiche, but I don't think that sounds too amazing as an actual name. So I thought I would turn it into a french name to give it some panache. So I now present Les restes aléatoires quiche. (If I got that wrong please tell me)I call it that because I make it with the things that I usually have in my fridge that are about to go bad. I eat a ton of spinach and mushrooms so I buy a lot, by the end of the week I always have some left that isn't salad ready, but isn't ready to be thrown away. This is my most common recipe but you can make it with anything. Another popular version is to take a half a pound of cooked bacon and use a large onion and crumble together.
Les Restes Aléatoires Quiche
2-3c. fresh spinach (finely chopped)
1c. crimini mushrooms (finely chopped)
1 med onion (white, yellow, red, whatever) (finely chopped)
2 T olive oil
1.5 c shredded cheese
4 eggs
1/4 t black pepper
Scant 1/4 t nutmeg
Refrigerated Pie crust (not in the pans but rolled out)
1. Ahead of time (anywhere from 48 hours to 4 hours). Preheat the olive oil to medium heat in a large skillet. Add onions, while the onions are softening I chop the mushrooms. Add the mushrooms, while they are cooking chop the spinach. Cook over low heat until the whole mixture is well wilted. Turn off the heat. Place a VERY clean dish towel in a colander, put the entire veggie mixture into the towel, let the liquid drip out, gather up the sides of the towel and squeeze out as much liquid as possible. Place into the fridge to cool. (should be between 1-1.5c total
2. Preheat oven to 375. Take the pie crust out of the package and cut into 3in circles. ( I use a cookie cutter, but a biscuit cutter, or even the top of a glass would all work) Grease a mini muffin pan. Place one circle in each mini muffin pan carefully.
3. In a medium mixing bowl hand mix the veggie mixture, eggs, cheese, and spices. Then scoop a small amount of mix into each pie crust lined muffin cup. The mixture should come to about 1/16 inch below the top of the crust. Unless you have two pans you will probably have some mix left.

4. Bake for 20 to 25 minutes. They should be puffy and golden brown. Let cool for 3-5 min them remove to cooling rack.
5. You can now re-line the muffin cups with crust and fill and bake again.
Makes appx 3 dozen mini quiche.
Les Restes Aléatoires Quiche
2-3c. fresh spinach (finely chopped)
1c. crimini mushrooms (finely chopped)
1 med onion (white, yellow, red, whatever) (finely chopped)
2 T olive oil
1.5 c shredded cheese
4 eggs
1/4 t black pepper
Scant 1/4 t nutmeg
Refrigerated Pie crust (not in the pans but rolled out)
1. Ahead of time (anywhere from 48 hours to 4 hours). Preheat the olive oil to medium heat in a large skillet. Add onions, while the onions are softening I chop the mushrooms. Add the mushrooms, while they are cooking chop the spinach. Cook over low heat until the whole mixture is well wilted. Turn off the heat. Place a VERY clean dish towel in a colander, put the entire veggie mixture into the towel, let the liquid drip out, gather up the sides of the towel and squeeze out as much liquid as possible. Place into the fridge to cool. (should be between 1-1.5c total
2. Preheat oven to 375. Take the pie crust out of the package and cut into 3in circles. ( I use a cookie cutter, but a biscuit cutter, or even the top of a glass would all work) Grease a mini muffin pan. Place one circle in each mini muffin pan carefully.
3. In a medium mixing bowl hand mix the veggie mixture, eggs, cheese, and spices. Then scoop a small amount of mix into each pie crust lined muffin cup. The mixture should come to about 1/16 inch below the top of the crust. Unless you have two pans you will probably have some mix left.
4. Bake for 20 to 25 minutes. They should be puffy and golden brown. Let cool for 3-5 min them remove to cooling rack.
5. You can now re-line the muffin cups with crust and fill and bake again.
Makes appx 3 dozen mini quiche.
Subscribe to:
Posts (Atom)